Marilyn Perry's Notes About The Krita Image Editor Software Application
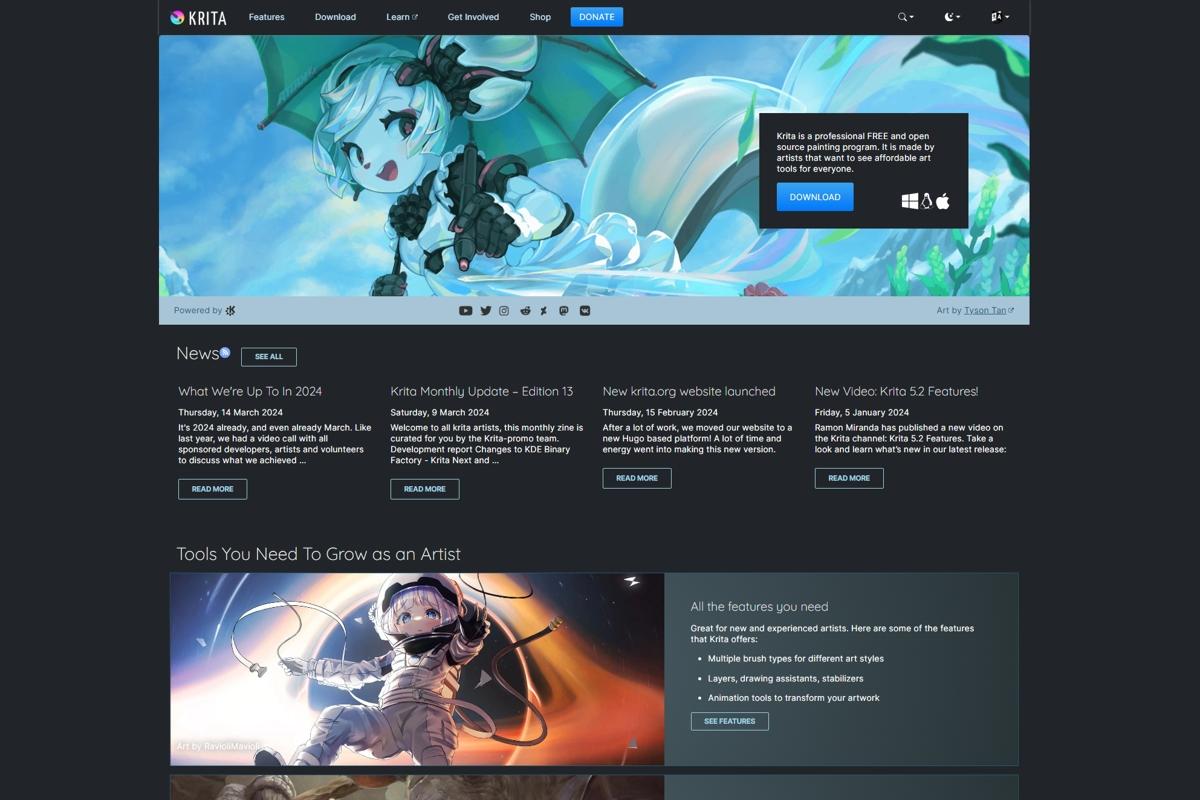
Krita
krita.org
The Krita Image Editor
The Krita image editor is an excellent choice for every day image editing. Krita is great for image editing tasks all the way from rudimentary cropping, resizing, and rotating, to complex and inventive digital painting. Krita is one of several image editing software applications of choice for every day image modifications. Krita is an open source software application. Krita is licensed under the GNU General Public License (GPL) version 3. Krita is free. However, Krita is supported by user donations. Krita is quite worthy of donations from its users. Krita is constructed with the help of the QT user-interface code library, and written in the C++ programming language. The following paragraphs provide step-by-step notes regarding a few frequently required image editing operations that Krita simplifies.
How To Crop and Resize an Image With Krita
The Krita image editor is a go-to application for quick and easy image cropping and resizing. Within Krita, image cropping and resizing can be performed in a single editing sequence. With an image open in Krita, select the [crop] tool from the [toolbar] at the left of the Krita image editing window.
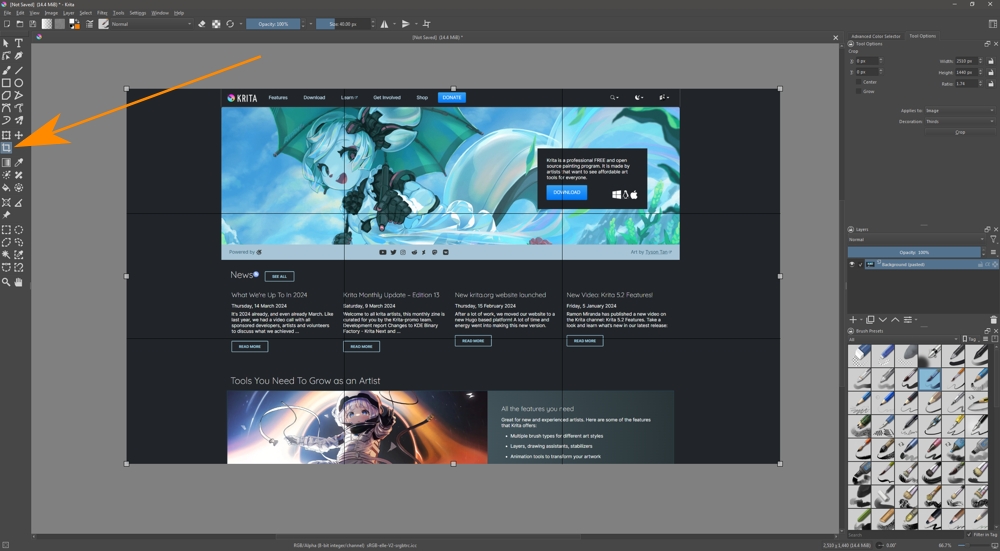
Most often, an efficient approach to cropping is to first click, drag, and select the entire image. Then, in the [tool options] dock panel at the right of the Krita window, the image's width, height, and aspect-ratio are visible. Although an image can be adjusted to a given aspect ratio as indicated in Krita, for example 1.50, it's likely best to use an aspect-ratio calculation tool to compute precise width and height values for a given aspect-ratio, which can be entered into the Krita width and height editing fields.
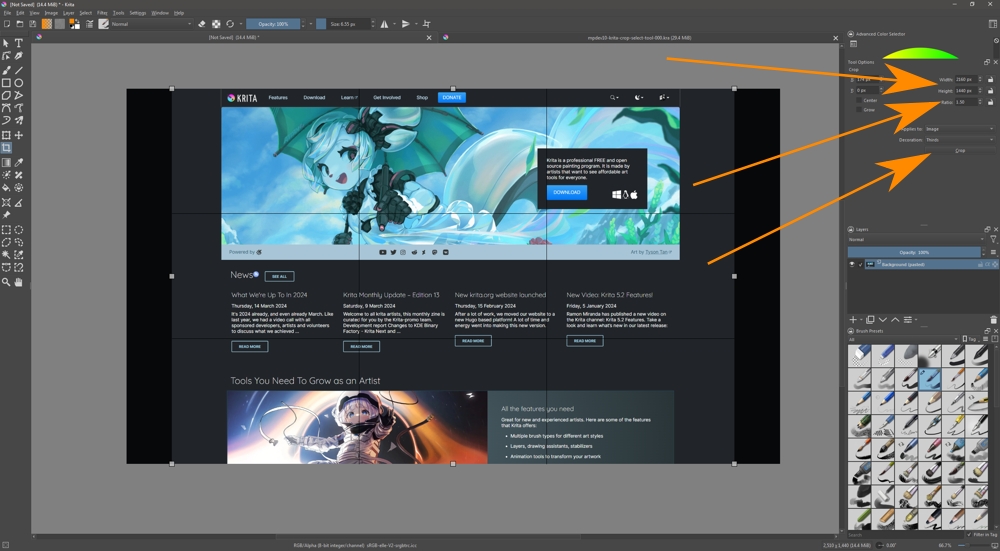
With the image's aspect ratio set, it's then easy to move the image selection to the desired portion of the image to be cropped. Once satisfied with the crop area options, in the [tool-options] dock panel at the right of the Krita window, click the [crop] button. To export the cropped image in the desired file format, and to optionally resize the image during the image export process, choose the [advanced-export] option from the Krita file menu. After naming the export file, click the [resize] tab, choose the desired width, and Krita will automatically calculate the correct height given the aspect-ratio of the cropped image. Reselect the [advanced-export] option from the [file] menu to repeat the process to save a cropped image in a variety of output sizes. Krita is by far one of the most convenient image editors available for performing this task, a task that can be quite frequent for anyone creating content with images for website(s).
How To Copy a Layer From One Krita Document To Another
There are two ways to copy a layer from one Krita document to another Krita document. The easy way is quite simple. With Krita in [tabbed] oriented window mode, first select the layer to copy. Then either use the [ctrl-v] keyboard shortcut to copy the layer or right click in the layer in the layer dock panel and choose [copy layer]. With the layer in the clipboard, switch to the window [tab] containing the destination Krita document for the copied layer. In the Krita layer dock panel, right-click and select [paste layer] (see figure 1). If necessary, then adjust the layer's position in the layer stack as desired.
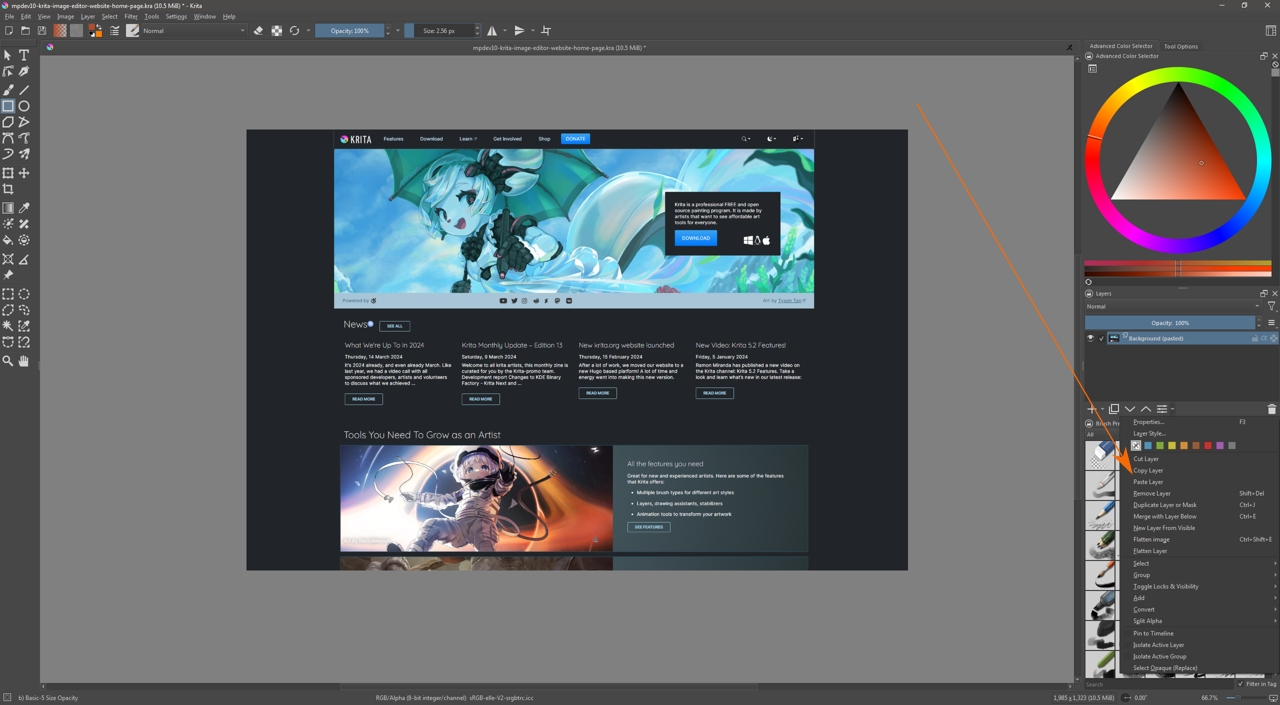
There is a second method for copying a layer from one Krita document to another. First, the Krita application Window environment must be setup in sub-window mode. The Krita sub-window mode setting is available in the setting dialog box: (menu) [settings][configure krita] (dialog box) [general][window]. The sub-window setting is near the top of the [window] in the modal dialog box. Once Krita is in sub-window mode, first open a primary Krita document. Then open the secondary Krita document. The secondary Krita document will appear in a smaller window, which can be enlarged. It is then possible to drag a layer from the primary Krita document to the secondary Krita document. The first method, described above, is likely much easier, and is likely the method that is most user friendly.
The Krita screenshots in these notes, including their arrow annotations, were all created with the Kirita Image Editor! Krita is a rather "kool" image editing tool.
Thank you for visiting this website, my personal website, and hopefully your enjoyment the information and content shared here publicly at www.marilynperry.com. Marilyn Perry | Saturday, March 2, 2024